How to Set a Password on ZIP Compressed File in macOS

There are times when you need to set a password on a compressed file when performing file compression on a Mac.
Setting a password on a compressed file can help enhance security by preventing unauthorized access to personal documents, photos, or when uploading them to cloud services.
Most free compression programs only offer basic compression functionality without the option to set a password when compressing files. Purchasing a paid app for this purpose may seem unnecessary due to infrequent usage.
Fortunately, macOS comes with built-in features to compress ZIP files, and you can use the Terminal to set a password.
Setting a Password on Compressed ZIP File in macOS
There are two ways to set a password on a ZIP file in macOS. The following method is the simplest way to compress a folder in Finder and then use a command to set a password on the ZIP file.
Compressing the File
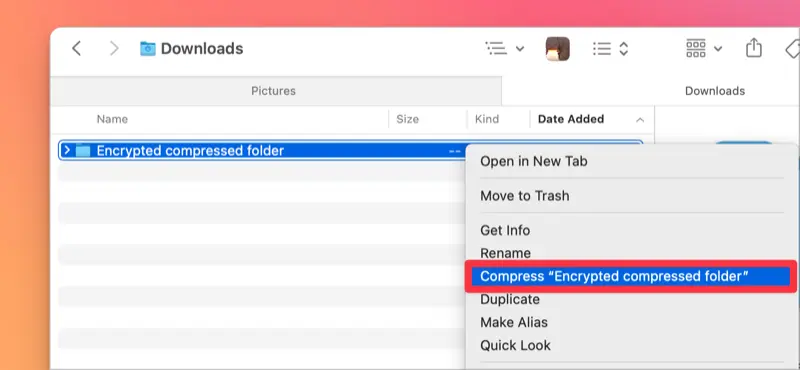
Right-click on the folder or file you want to compress and select Compress "File Name".
Running Terminal and Entering the Command
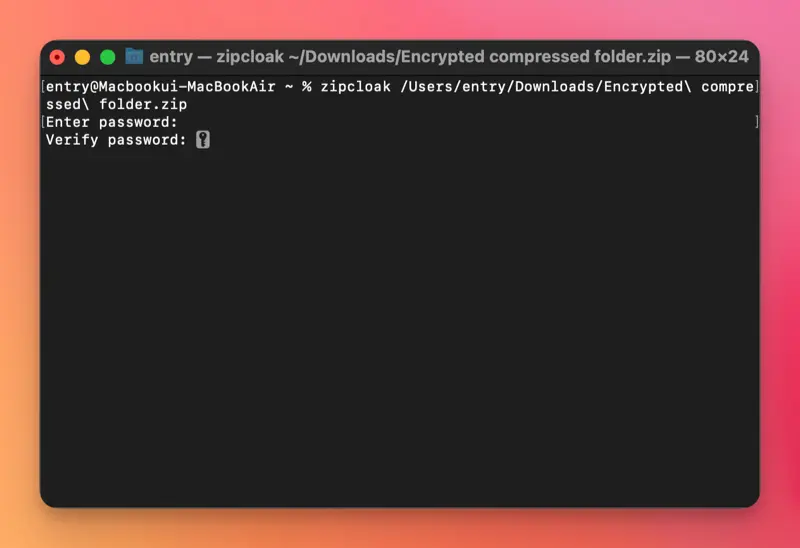
Launch Terminal, then enter the zipcloak command followed by the path of the ZIP file or drag the ZIP file to automatically enter the file path, and then execute it.

zipcloak [ZIP File path]Setting a Password on the ZIP File
Once you enter the above command and the file path, a password setting window will appear. Please note that when entering the password, the ‘*’ character will not be displayed.
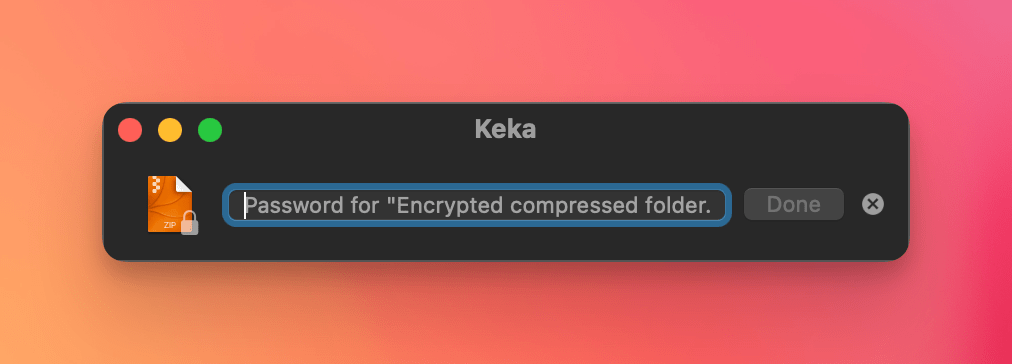
Now, try to extract the ZIP file! If it asks for a password during extraction, the password setting has been successfully completed.
You can set a password on ZIP compressed file in this way. You can also directly set a password when compressing files or folders in the Terminal.
Setting a Password When Compressing ZIP Files
You can also set a password immediately when compressing files or folders directly in the Terminal. If you’re comfortable using the Terminal, you can follow this method.
Running the Terminal
Launch the Terminal and navigate to the location where the file or folder you want to compress is located. You can drag and drop the folder, and the path will be automatically entered, as shown in the image below.
cd [File path]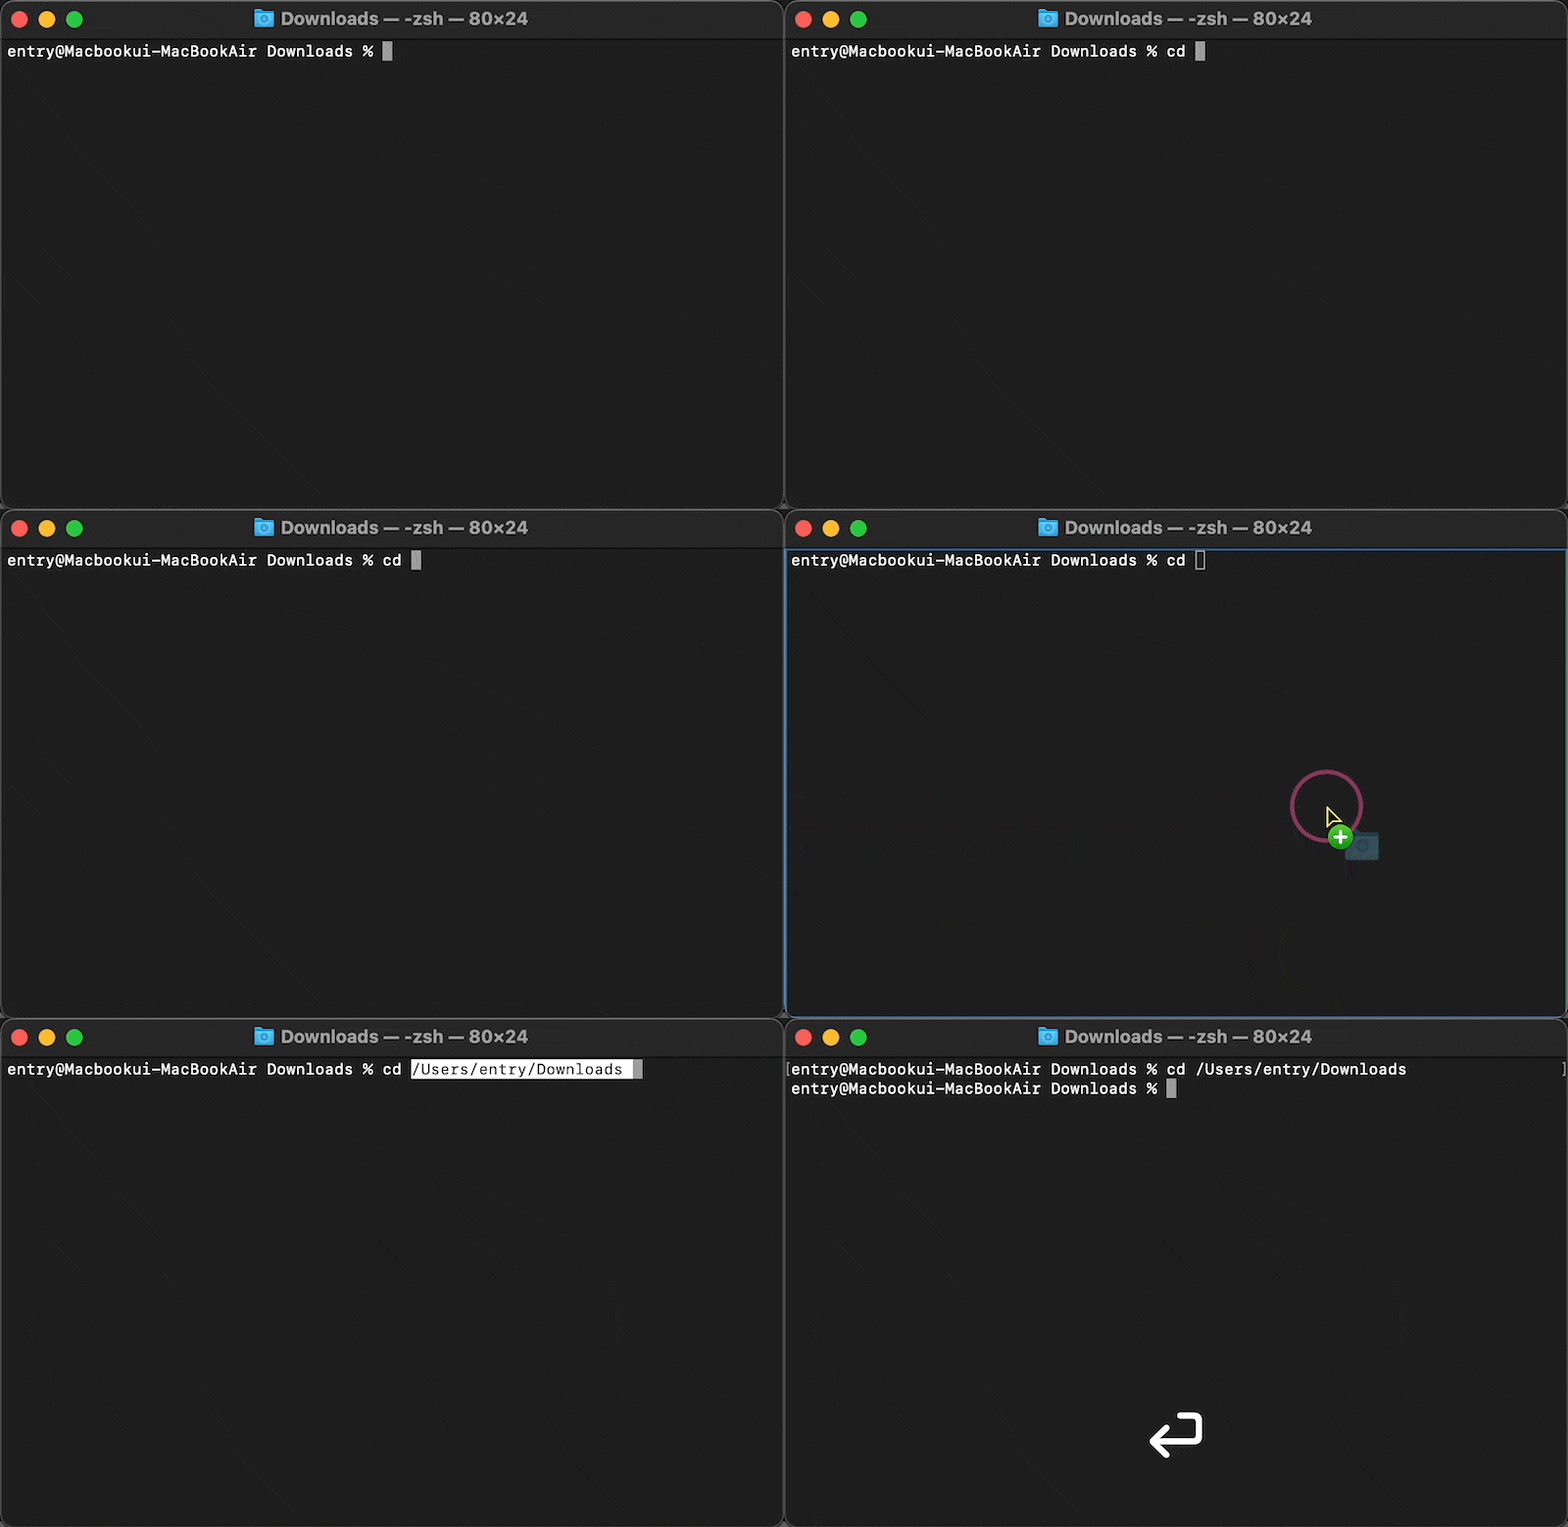
Entering the File Compression Command
Refer to the command and image below to enter the file compression and password-related commands, and enter the password.
zip -erj [Name of the zip file to be compressed] [Location to store the compressed file]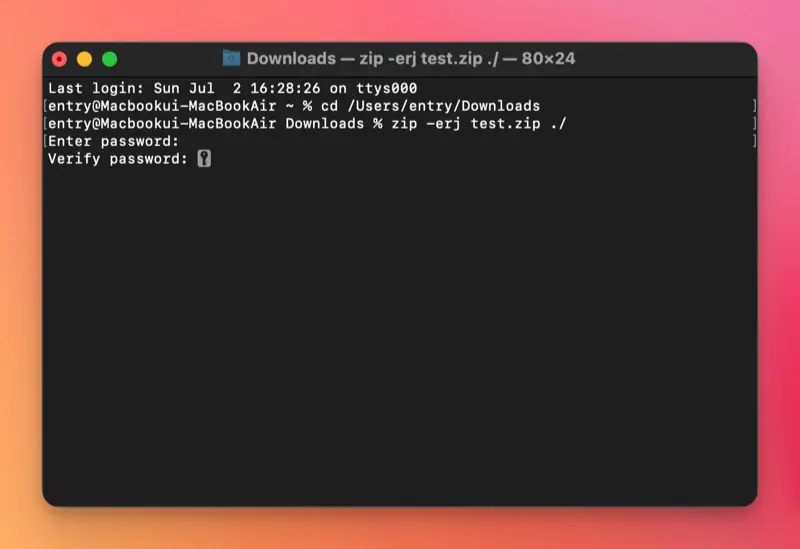
❕Command Options
- e: Encrypts the file
- r: Preserves the folder path when the target is a folder and compresses the files
- j: Ignores folder structure and compresses all files into a single folder
Verifying the Password Setting
Now, navigate to the folder where the compressed file is created and try to extract it.

If a password prompt appears as shown in the image below, the creation of the password-protected compressed file is complete.
You can set a password on a compressed file in macOS using these two methods. Using a separate application can make the process much simpler, but for those who prefer to utilize the built-in features of macOS and don’t want to install additional applications for password protection, this method will be helpful.