Installing Stable Fusion WebUI on PC
Stable Fusion is an AI illustration program that converts text input into images. It has gained significant attention as an open-source project by Stability AI.
Stable Fusion allows users to create images in various styles, including realistic and animated characters. It is implemented in a command-line interface (CLI) format, making it convenient for prompt-based usage.
To cater to users who find the CLI inconvenient, Stable Fusion also supports a web-based user interface (WebUI). Installing the Stable Fusion WebUI version requires some initial setup.

Before installing Stable Fusion on your PC, it is helpful to have an understanding of concepts such as checkpoints, Lora, VAE, and embeddings. However, this guide aims to assist users in setting up the environment to create AI-generated realistic images without in-depth knowledge of Stable Fusion.
Stable Fusion requires GPU acceleration, so the specifications of your graphics card are important. If your PC specifications are not ideal, you can still use Stable Fusion through Google Colab, which provides a learning-friendly environment. However, recent changes have made Stable Fusion Colab a paid service, making it more convenient to install Stable Fusion on your PC for comfortable usage.
To install and run Stable Fusion WebUI on your PC, you will need to prepare a few things.
Materials Required
- Stable Diffusion WebUI – AUTOMATIC1111
- NVIDIA Graphics Card
- Python (Python) version prior to 3.11
- Git
You can use the AUTOMATIC1111 version of Stable Diffusion WebUI, which can be found here.
GPU acceleration is the default requirement for NVIDIA graphics cards, but there are separate porting versions available for other models such as AMD, Intel, and MacBook (macOS).
Due to limited testing equipment and conditions, it is not possible to provide installation instructions for all graphics cards. Therefore, this guide assumes the usage of an NVIDIA graphics card.
How to Install Stable Fusion on PC
The WebUI of Stable Fusion is written in the Python language, so Python is essential for its proper functioning.
If you use Python version 3.11.x, Stable Fusion will not run properly, so use the latest version from the 3.10.x series.
Git is used as a means to download and install open-source packages from GitHub onto your PC, and it is also used to automatically update packages downloaded with Git.
Python Installation
- Go to the Download page of the official Python website.
- Click on Python 3.10.11 in the download list.

- From the Files section at the bottom of the screen, click on Windows installer (64-bit) to download it.
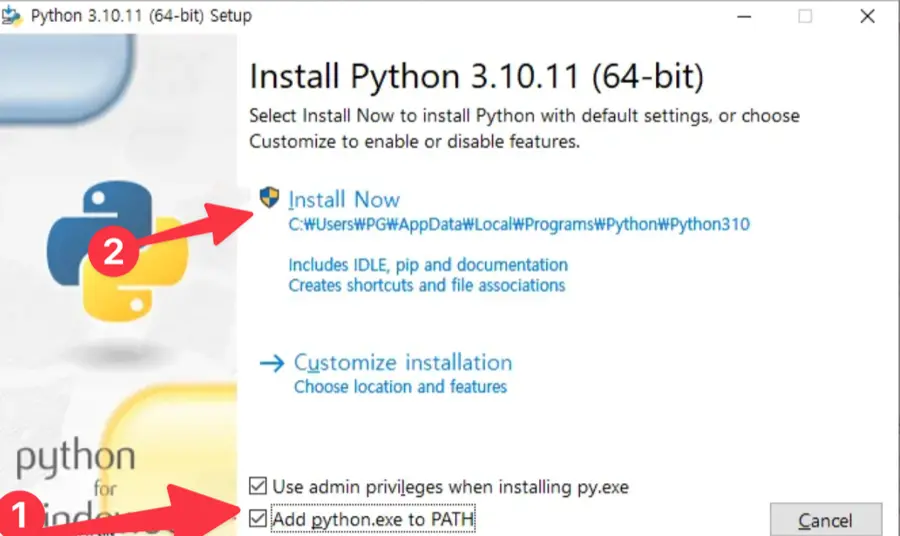
- On the Python Install screen, check the box for Add python.exe to PATH at the bottom, then proceed with the installation.

- On the final Setup was successful screen, if the Disable path length limit button appears, click on it to apply the changes.
- After completing the installation, open the command prompt and enter
python -Vto check if Python is successfully loaded.
The “Add python.exe to PATH” option is used to add Python to the environment variables of your Windows account. This allows you to run python.exe from any command prompt location, even from the root directory, without specifying the full path.
When running the Stable Fusion WebUI, it loads the program through Python. If you install Python without selecting this option, it may result in an “exit code: 9009” error.
The “Disable path length limit” option removes the path length limitation (260 characters) in Windows. This allows you to navigate to files and folders with longer names or paths, ensuring that you can access them without any issues.
GIT Installation
Git is essential to install as it is used to check and update packages when running the Stable Fusion WebUI, as well as manage resources related to Stable Fusion.

- Visit the official Git website.
- Download the 64-bit Git for Windows Setup from the standalone Installer section.
- Agree to the terms of use, then click the Install button to proceed with the installation.
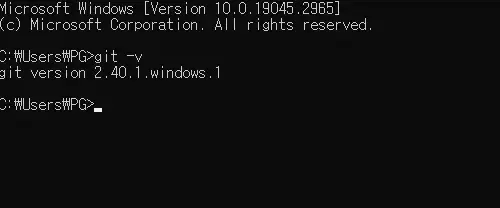
- In the command prompt, enter
git -vto verify if it has been added to the environment variables correctly.
Installing Stable Diffusion WebUI
Once you have Python and Git ready, you can install Stable Diffusion WebUI through the command prompt.
The default package size is large, and you will need ample disk space for future extensions like Lora and Checkpoint. You can install the software in any location that is convenient for you.
- Open the command prompt.

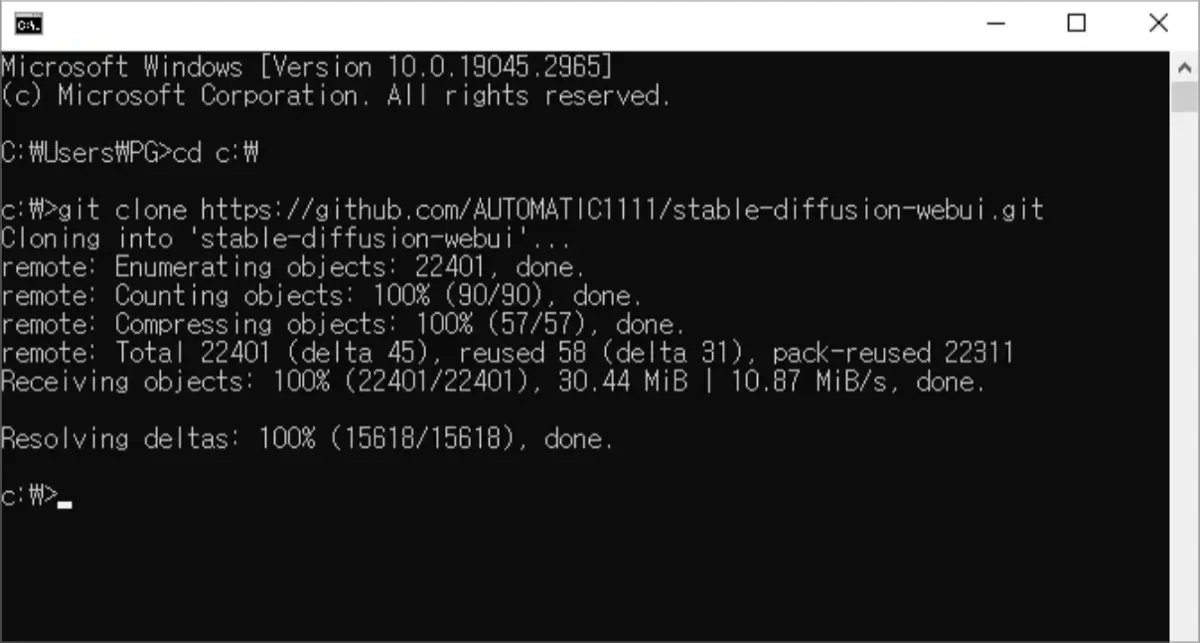
- Navigate to the root folder where you want to install Stable Diffusion.
- For example, if the top-level directory is on the C drive:
cd C:\\ - For example, if it’s on your desktop:
cd %userprofile%\\Desktop
- For example, if the top-level directory is on the C drive:
- Enter the command
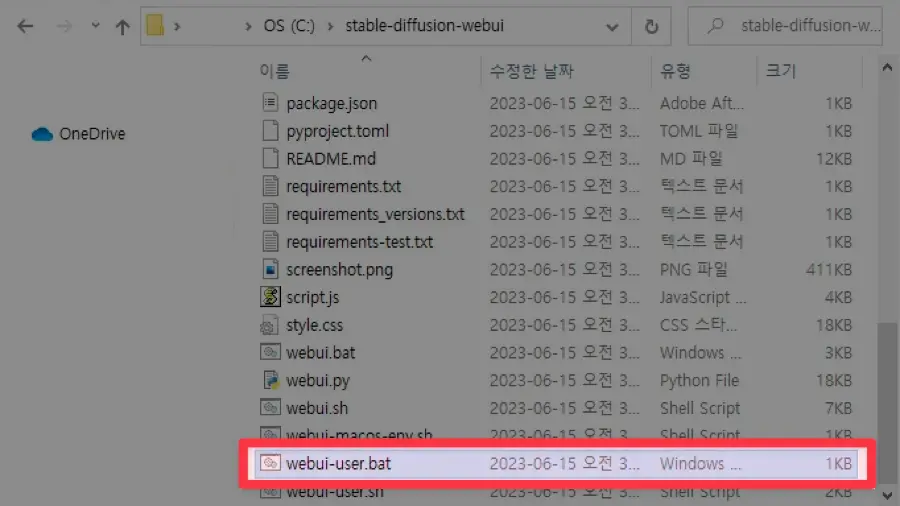
git clone <https://github.com/AUTOMATIC1111/stable-diffusion-webui.git> to copy Stable Diffusion WebUI to your PC. - Go to the stable-diffusion-webui folder in Windows Explorer.

- Double-click on webui-user.bat to run it.
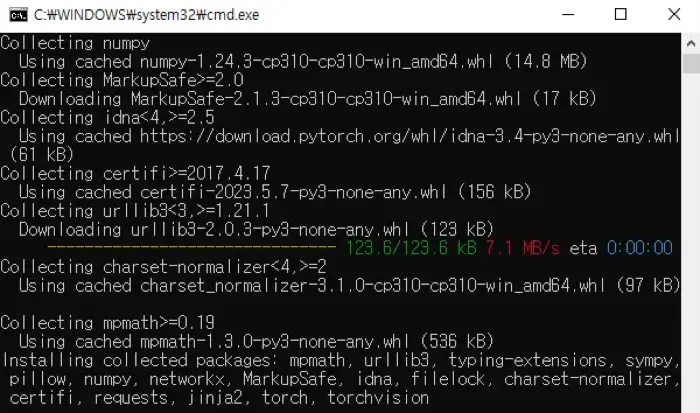
- When running Stable Diffusion WebUI for the first time, it will download various resources and model packages from the web.

- Depending on your PC specifications, it may take a while. Please wait until all the packages related to Stable Diffusion are installed.
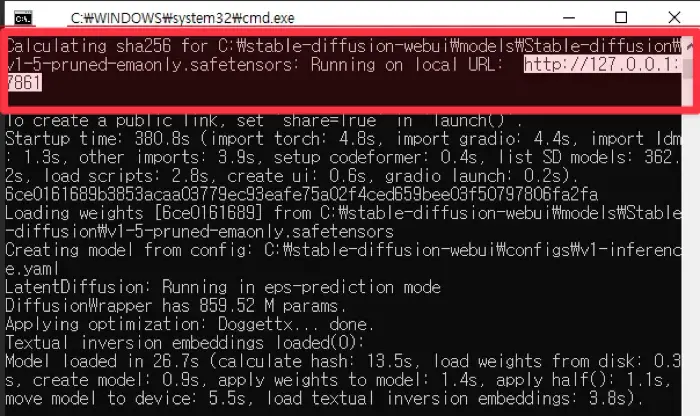
- Once all the packages are installed, a local URL will be displayed in the command prompt. Copy this URL and paste it into your browser to access it.

Note that the port number in the webui address is not fixed and will change each time you run Stable Diffusion. Therefore, you need to check the command prompt every time and connect accordingly. - Enter the keyword for the image you want to generate in the txt2img input field and click the Generate button to create the picture.
If you do this, you can install the Stable Fusion WebUI on your PC, allowing you to use the image generation AI directly without having to access a separate website. If you have any questions about this tutorial, please leave a comment below.

